What are Custom Fields?
Custom fields let you store extra data points about your contacts that help you tailor your outreach to each person. Fields like city, polling locations, membership IDs, or contribution history will help you personalize your text messages and calling scripts. Using custom fields helps you make your outreach more personal and effective.
Custom fields are also required for integrations with external systems. If your account is configured with an integration, like VAN, certain custom fields will be automatically created. These fields ensure your data is synced with external systems.
In this guide, you’ll learn how to create and manage custom fields, use them in group uploads, and configure them for exports and integrations.
TABLE OF CONTENTS
- Why Use a Custom Field?
- Creating a Custom Field
- Mapping Custom Fields in Groups
- Managing Existing Custom Fields
- Using Custom Fields in ThruText and ThruTalk
- Custom Fields for Integrations
Why Use a Custom Field?
Each custom field creates a variable that you can insert into your ThruText or ThruTalk scripts. When you upload your list of contacts, called a group in GetThru, each column you map as a custom field becomes a variable you can use in your scripts. This way, one script can be unique to thousands of people.
For example, say you had a contact's county and the corresponding ballot drop box location - you could share the drop box location for each contact dynamically. In this example, the county and drop box address were uploaded as columns. Those values are then automatically filled in when the messages are sent.
In the image below, see how %county% and %drop_off% are replaced with real values from contacts in the message preview.

Further in this guide, after you've learned how to create custom fields, we'll share guides on how custom fields can be used in ThruText and ThruTalk.
Creating a Custom Field
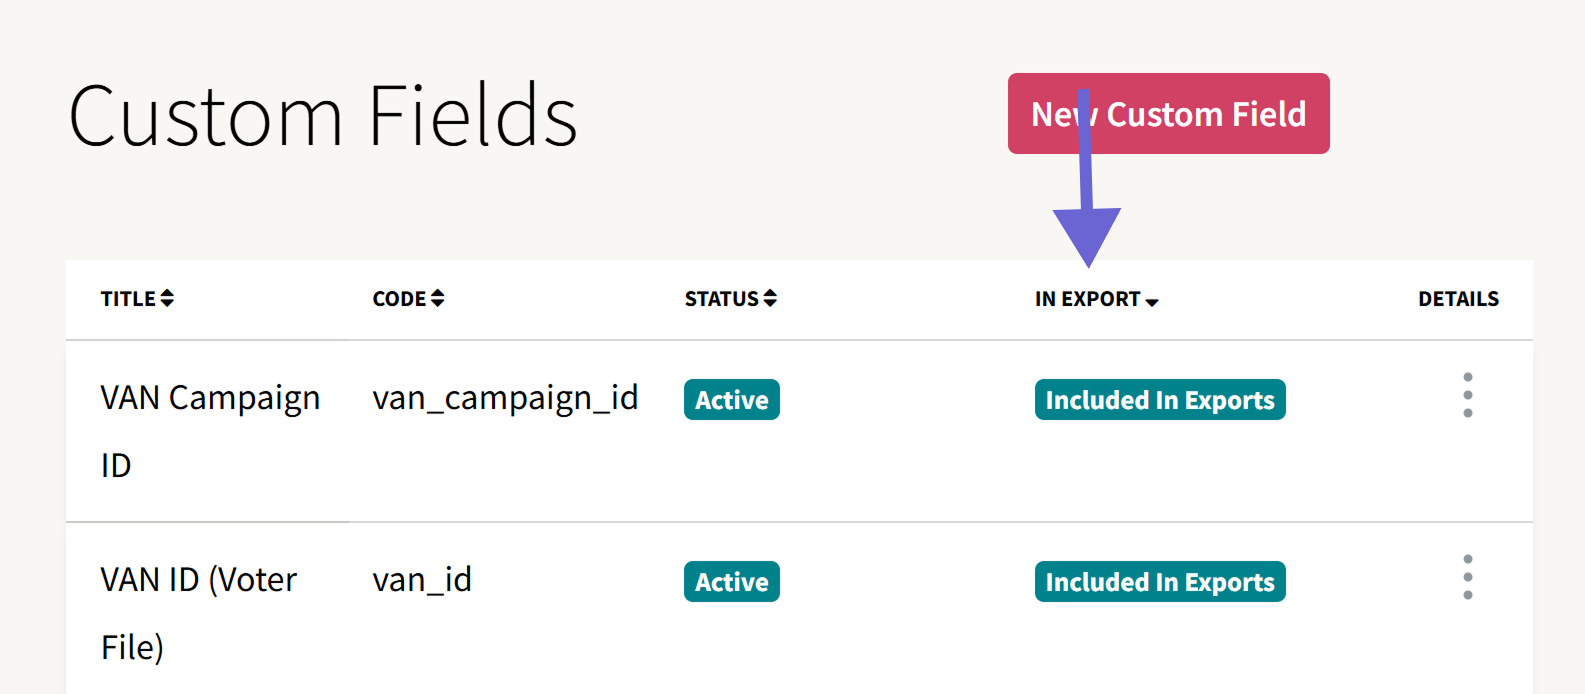
Before you can add custom fields during group upload, you need to create them in your account. Start by navigating to the sidebar navigation menu, expand Account Tools, and click Custom Fields. Next, click the New Custom Field button at the top of the page:

Enter a Title and Code for your custom field.
- Title: Create a descriptive title for the custom field to help identify it from a dropdown menu.
- Code: The code is used to insert the field into text and calling scripts. We recommend keeping the Code short but clear so it's easy to recognize later.
Include in exports?
When you're creating your custom field, you'll see a checkbox labeled Include in exports?.

By enabling Include in exports, a column will be added to your exports for that custom field, ensuring that the field's data will be in your exports. An export is a file of data produced from your text or phone banks. These columns will contain the data that you upload when you create your contact lists (aka the group).
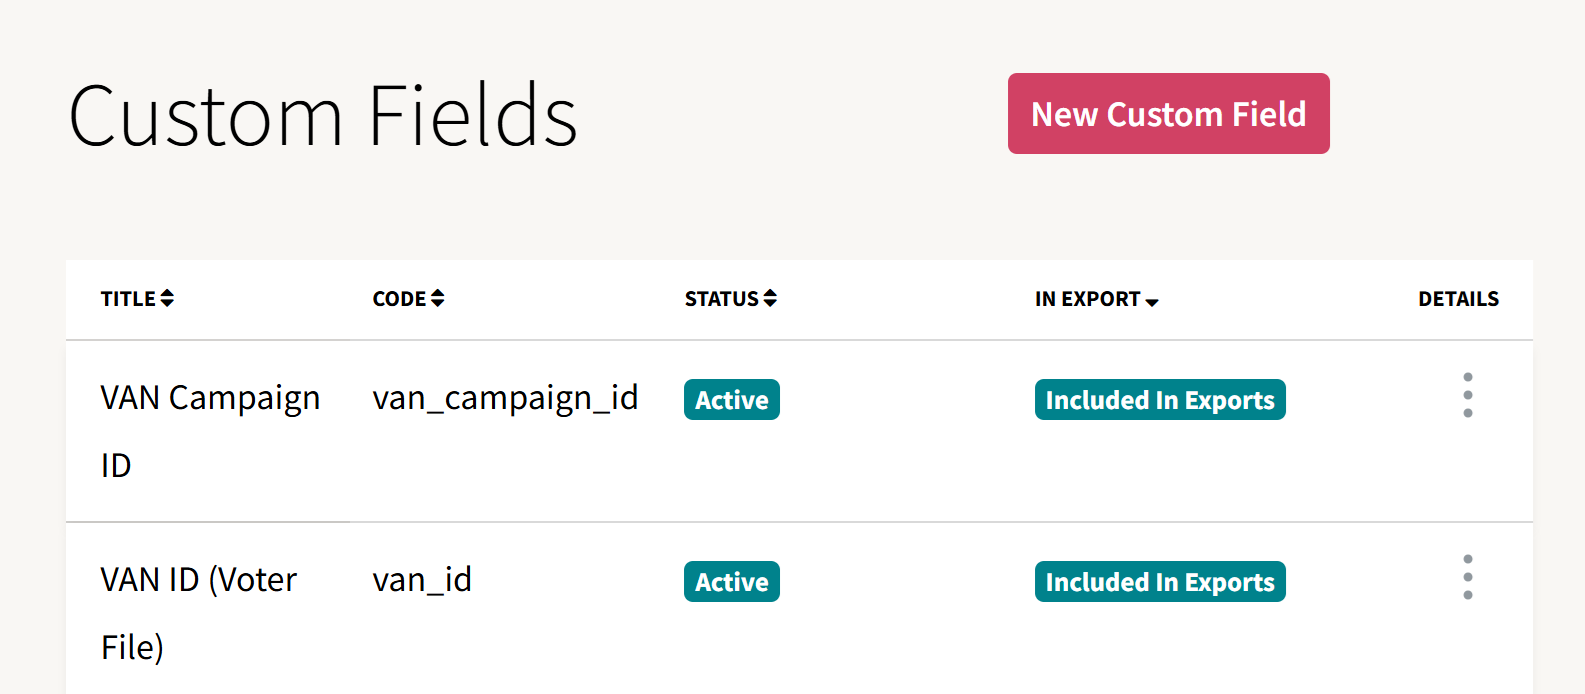
Exports can include up to 3 custom fields. Once you hit that limit, you'll need to remove one to add another. When you include a custom field in an export, you'll see a tag on the Custom Fields page that indicates which custom fields are included in your exports:
Read more about exports here:
Why This Matters
A common reason to include custom fields in exports is when results need to be synced with an external system, for example, uploading IDs back into VAN or another CRM. Many external systems require a unique identifier (like a contact ID) to match results with their internal records. By marking a field as “Include in exports,” you add the data to your export files for smooth syncing.
Mapping Custom Fields in Groups
After you’ve created your custom fields, you’ll be able to map custom fields during step 4 of the Group Upload process. Groups are the lists of contacts that you use to send messages and make calls in your campaigns. For a detailed walkthrough on uploading groups, read our guide on Uploading a Group.
In the image below, you can see the custom field dropdown in step 4 of the Group Upload process. This step lets you connect data columns in your contact file to specific fields in your account.

You can map the column to the custom field by selecting the column from the dropdown menu. GetThru will automatically try to match fields when the column headers in your file exactly match your custom field names. In the example above, if you upload a file that has a header named "email", you will see that the column is already selected.
After completing the group upload process, you'll arrive at the Group Details page, where you can see the custom fields that you mapped in the Custom Fields table.

Here you can see which custom fields were used and which columns were mapped to each field. To read more about this page, see our guide: Group Details Page.
Managing Existing Custom Fields
After creating a custom field, you can edit, archive, or delete them from the Custom Fields page.

- Edit: Click Edit to change the custom field title or to toggle the Include in exports setting. The custom field code can't be edited after it has been created.
- Delete: You can permanently remove a custom field if it has never been used on a group. Once a custom field is used in a group, you will only be able to Archive a custom field.
- Archive: Archiving a custom field will hide it from the list of custom fields during group upload, but it will not permanently delete it. This ensures that the data still exists when you generate an export that contains that custom field. After archiving, you'll see an "Archived" tag on the custom fields page. You can also Unarchive a custom field to reinstate it and use it on group uploads.
Using Custom Fields in ThruText and ThruTalk
Once you've created your custom fields and mapped them during group uploads, you can add them as variables to your ThruText messages or ThruTalk Scripts.
For example, you can use a custom field like Expiration Date to insert each contact’s expiration date into a calling script automatically. In the image below, you can see that the expiration date was dynamically added to a calling script.

For more detailed information on how to use custom fields in ThruText or ThruTalk, check out our guides:
Custom Fields for Integrations
When you configure your account with one of our integrations, GetThru automatically creates certain custom fields. In the image below, you can see the two custom fields that are created when you set up a new VAN integration.
While the VAN custom fields are automatically added when you add a VAN key, Include in export is not. However, if you want your VAN IDs to be included in exports, you can enable that setting before or after using the custom field.
Review our guide, GetThru VAN Integration Overview, for more information.
Please reach out to support@getthru.io if you have any questions.