
Admin Messenger Management and Reassignment
The Admin Messenger lets moderators, admins, and account owners review conversations in a ThruText campaign and reassign them when needed. Use it to check conversation status, move conversations between senders, and make sure contacts receive timely responses.
This guide explains how to access the Admin Messenger, review assignments and conversations, and reassign conversations.
TABLE OF CONTENTS
Accessing The Admin Messenger
To access the Admin Messenger,
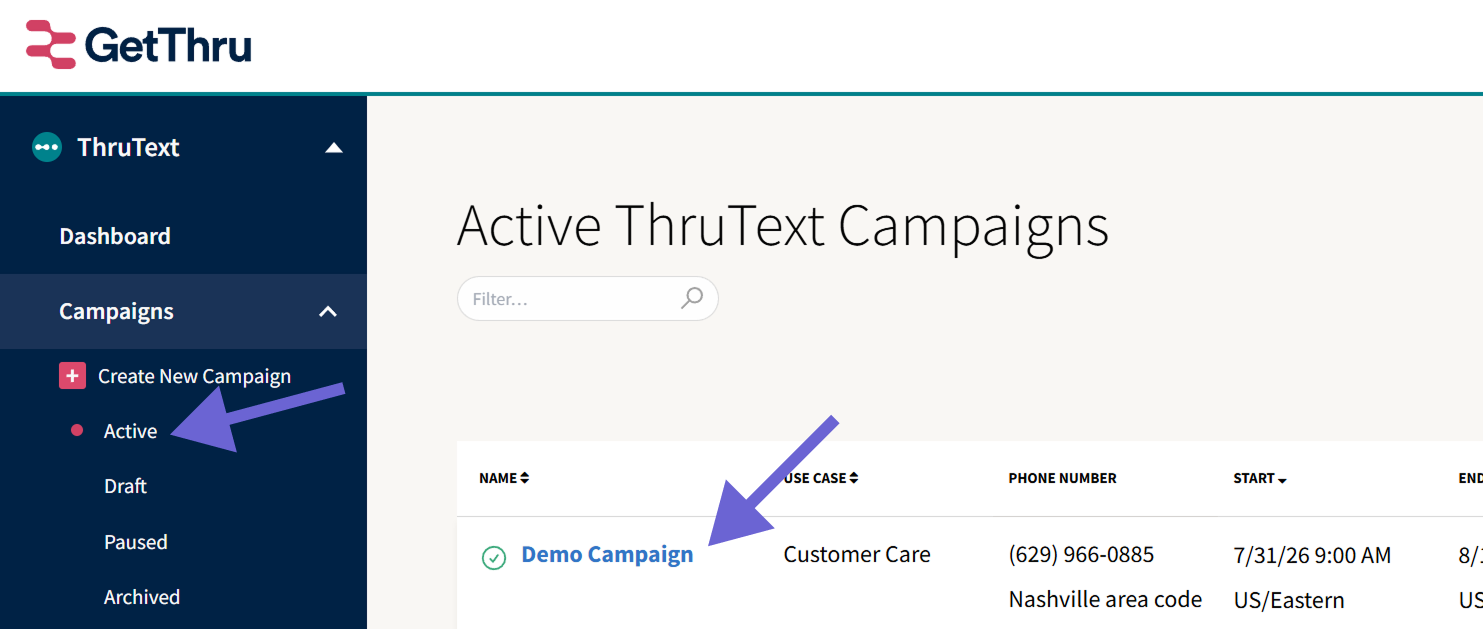
- From the left side navigation menu, expand ThruText.
Expand Campaigns.
Click Active.
- Click the linked Name of the campaign.
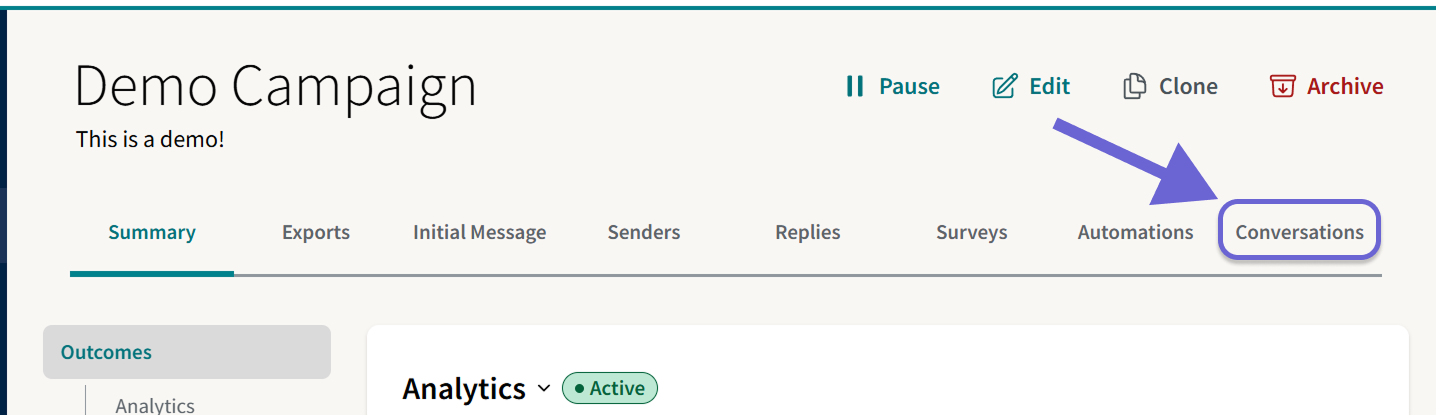
- Click Conversations
- Click View or on a sender's name
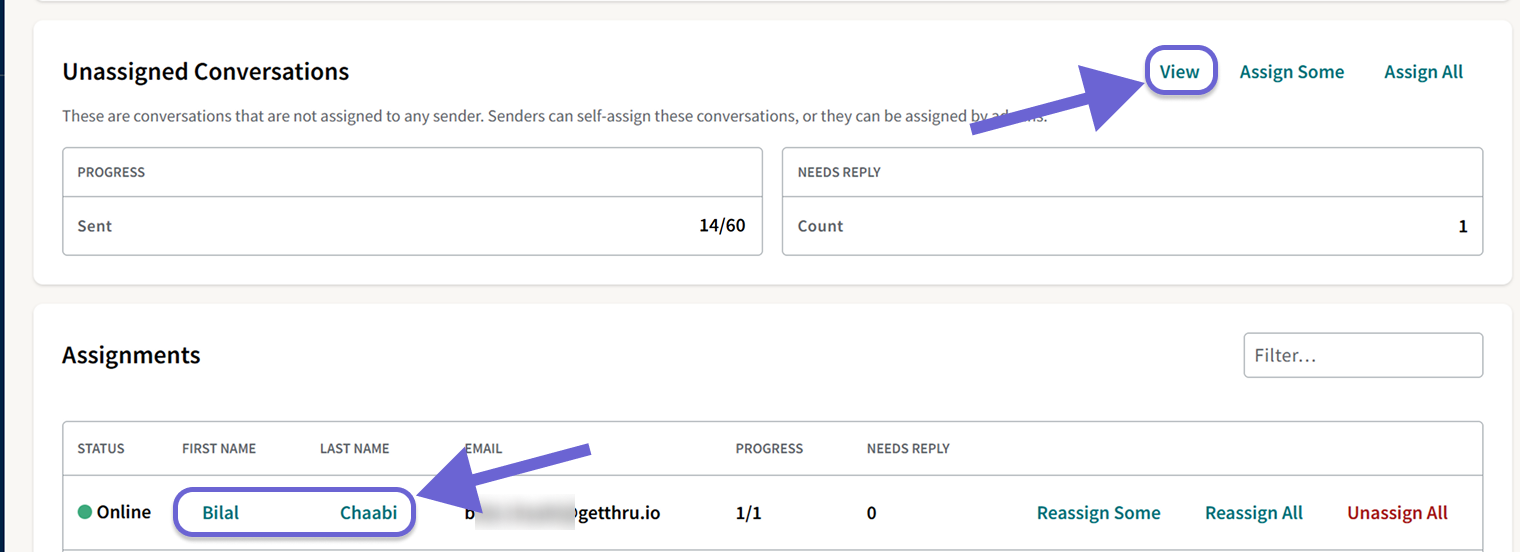
To read more about the Conversations page, see our guide, Conversations Management and Reassignment.
Admin Messenger And The User Messenger
There are two messengers in ThruText with different levels of control and visibility. The User Messenger is intended primarily for message sending, while the Admin Messenger can also be used for campaign management.
The Admin Messenger can be accessed from the admin dashboard and can be easily identified by the yellow banner across the top:
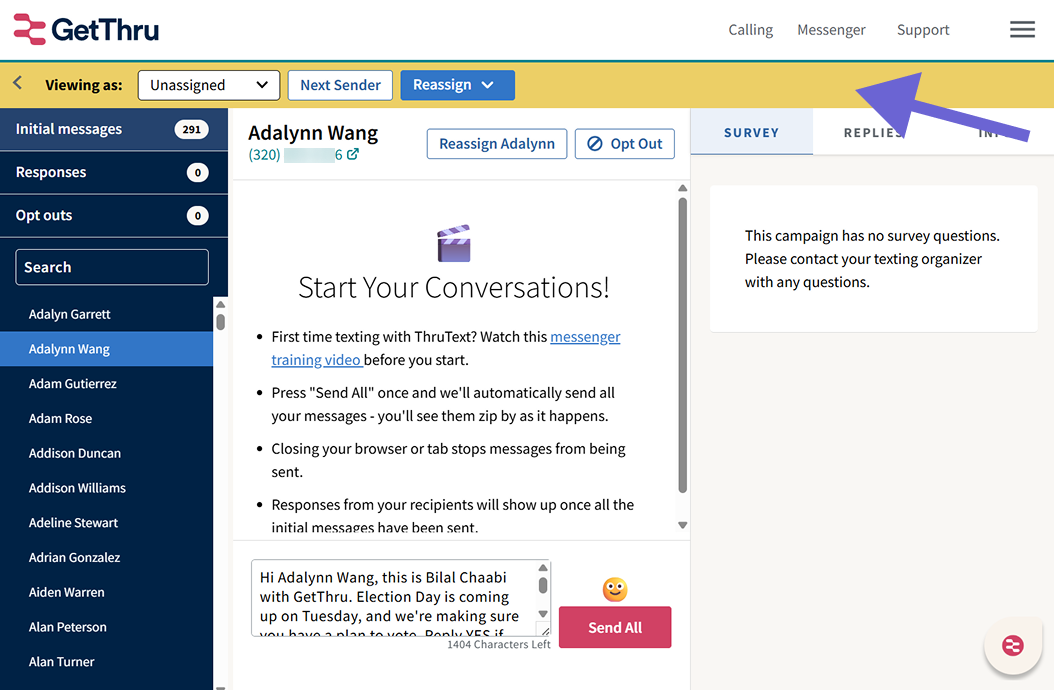
The Admin Messenger is accessible only to users with the Moderator, Admin, or Account Owner permission level. It lets you review conversations by status and reassign conversations between senders.
The User Messenger can be accessed by clicking on Messenger at the top right and selecting an assignment.
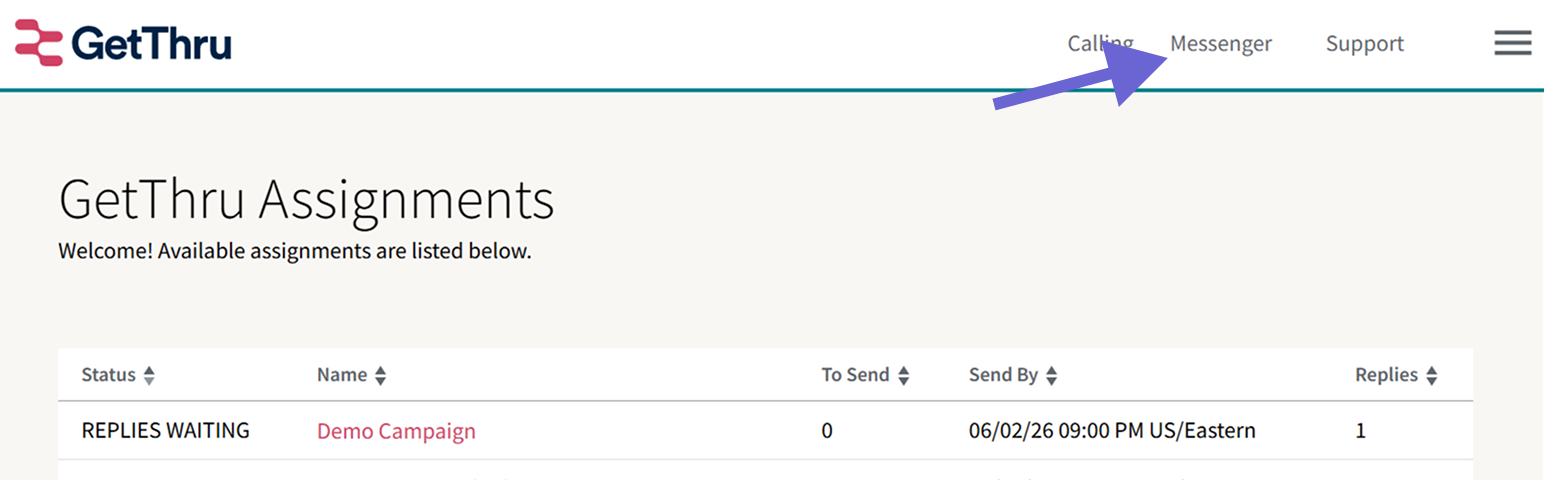
The User Messenger is accessible only to users with the "User" permission level. It prioritizes actionable conversations and does not provide reassignment controls. For more information about this messenger, read our guide, Messenger - The Texting Interface.
For more information on permission levels, read our guide, Permission Levels.
Admin Messenger Overview
The Admin Messenger has four main areas: conversation filters, sender assignment controls, the conversation view, and assignment details. These let you locate conversations, review sender workloads, manage assignments, and view campaign information.
Filter And Sort Conversations
Use the left panel to find conversations by status, search for a contact, or change the order in which conversations appear.
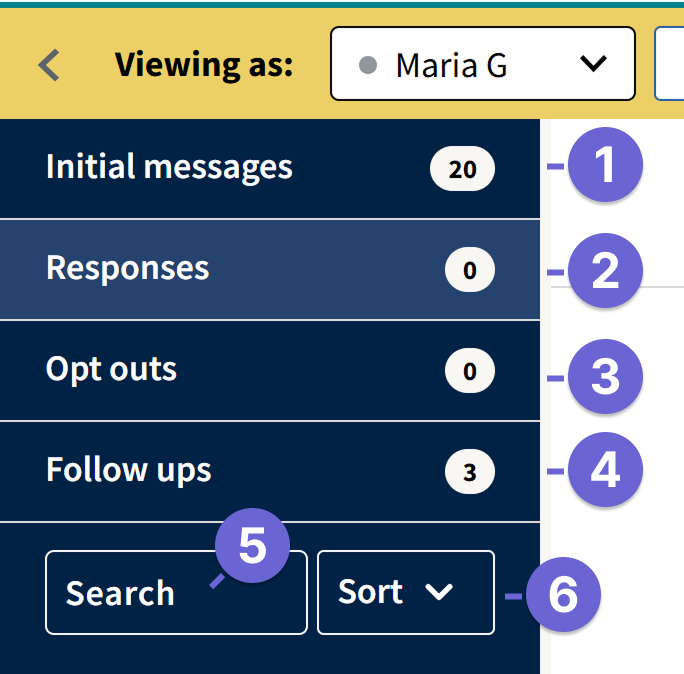
- Initial Messages: Shows conversations whose initial message has not been sent. This tab does not appear when there are no unsent initial messages, or when the initial message sending window has closed.
- Responses: Shows conversations where contacts have replied.
- Follow-ups: Shows conversations with an active followup message that has not been sent. Read more in our guide, Followup Messages in ThruText.
- Opt Outs: Shows opted-out conversations, including opt-outs processed manually or automatically.
- Search: Find a conversation for a specific contact by name
- Sort: Change the order of conversations
- Needs Reply: Groups conversations that need a reply at the top of the list. A conversation needs a reply when its most recent message is incoming from the contact. Within each group, the newest conversations appear first.
- Recent: Orders conversations by the time of the most recent activity without grouping them by reply status.
- A to Z: Orders conversations alphabetically by contact name, with A at the top and Z at the bottom.
Conversations will not be visible in the Admin Messenger if an initial message was sent, but the contact did not respond. Generate a campaign export to review all conversations or messages.
View Assignment and Reassign Conversations
The yellow bar shows which sender’s assignment you're viewing, and lets you switch between senders and reassign conversations.
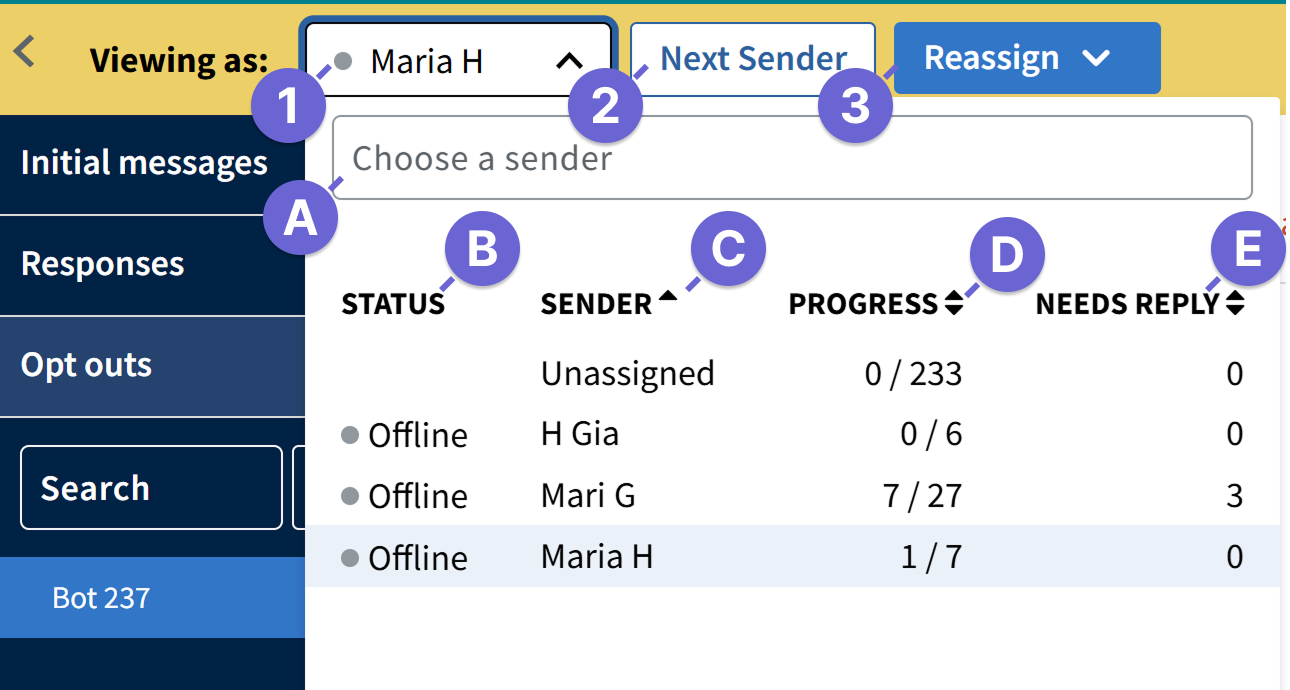
- Click the sender's name to open a dropdown of senders.
- Senders will be listed in the sorting order last used on the Senders table on the Conversations Overview page. The following sort options will display:
- Search: Find a specific sender by name.
- Status: Senders who have the User Messenger open appear as Online, while others appear Offline.
- Sender: Sort the senders by name. Unassigned always appears at the top.
- Progress: Sorts first by the total number of conversations assigned to a sender, shown as the denominator, and then by the number sent, shown as the numerator.
- Needs Reply: Sorts senders by the number of conversations that need a reply.
- Senders will be listed in the sorting order last used on the Senders table on the Conversations Overview page. The following sort options will display:
- Click Next Sender to go to the next sender's assignments.
- Use the Reassign drop-down to move conversations to another sender.
- Unassign All: Move all conversations from the sender to unassigned.
- Reassign Some: Move a specified number of conversations to other senders in the campaign.
- Reassign All: Move all conversations from the sender to other senders in the campaign.
When you Reassign Some or Reassign All, you can choose which conversations to move based on status:
- Choose the conversation status of Not Started, Needs Reply, or Any.
- Choose to move all conversations from the sender to unassigned, to other specific sender names, or across all other senders in the campaign via distribute to all users.
Conversation View
The conversation view shows the message thread between a sender and a contact. It also provides controls for managing the contact's assignment, opt-out status, and messages.
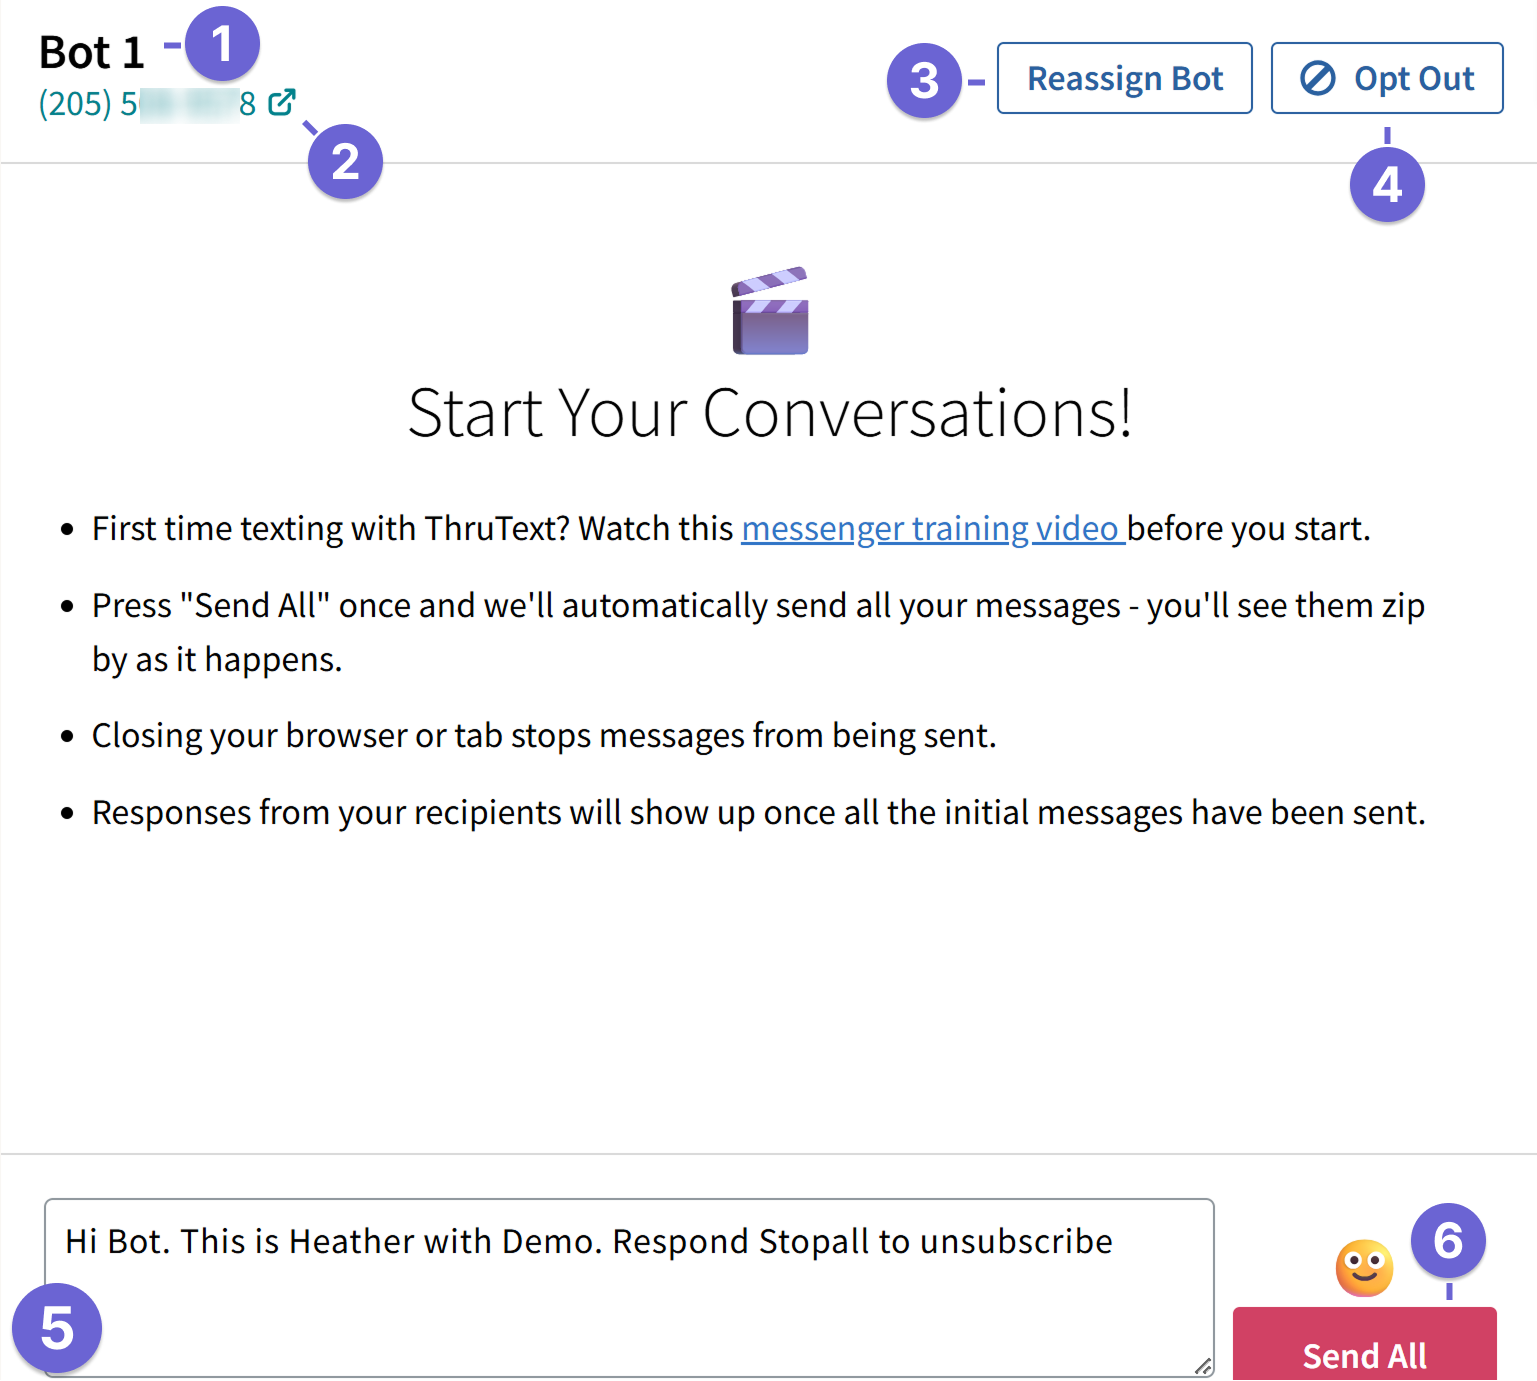
When viewing a conversation, the upper bar displays:
- Contact name: Name of the contact
- Phone number
- Clicking the phone number takes you to the Contact Phone Number lookup page, with the search results for that number displayed. Read more in our guide Contact Phone Number Lookup.
- For added privacy, the phone number can be hidden from the Admin Messenger. Contact support@getthru.io to request this feature.
- Reassign: Moves the contact's conversation to another sender or to Unassigned.
- Opt Out / Opt In: Use this to prevent a contact from receiving any further messages from your account. You can also Opt In to reverse and Opt Out.
- Message Box: Contains the message that will be sent to the contact.
- Send: Click Send or Send All to send messages. Check out our Sending Methods guide for more details.
View Assignment Details
The right panel contains information and tools related to the current conversation and campaign.
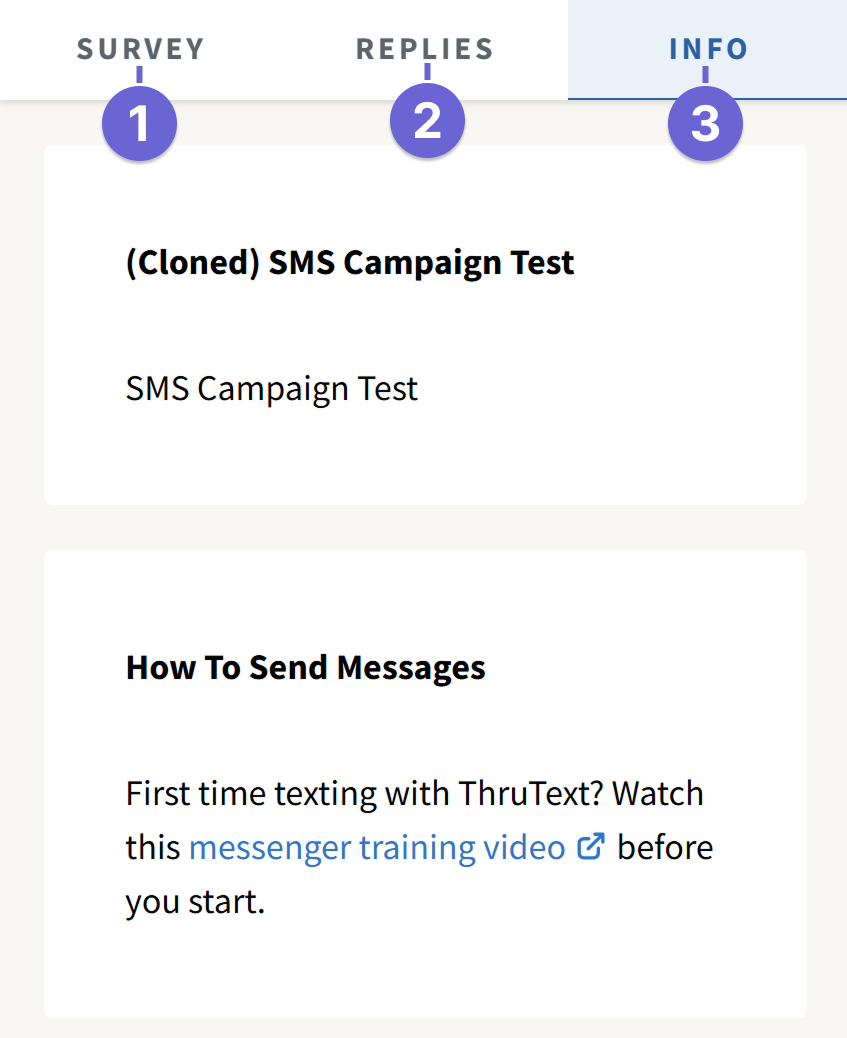
- Survey: View and edit survey responses. To create survey questions, you'll need to add them at the Survey step before launch or via the active campaign's Survey tab after launch. Check out our Survey Questions guide for more details.
- Replies: View or use available campaign or global Recommended Replies. For more details on recommended replies, check out our guide, Recommended Replies.
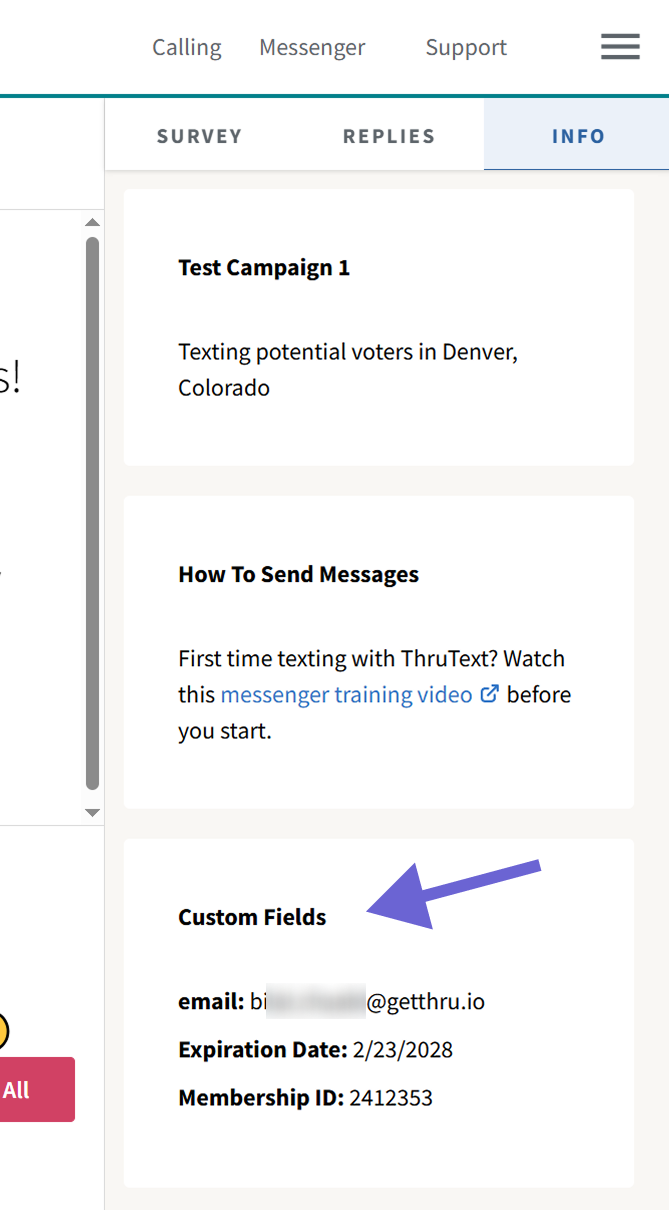
- Info: View campaign name and creation details. If your campaign contains custom fields, you can view a contact's custom fields in this tab:
Want to see the admin messenger in action? Watch a video tutorial on Reassigning Conversations here: How To Reassign Conversations (ThruText Video). Reach out to support@getthru.io if you have any questions.